- Manufacturer: Ericsson
- Phone Model: A1228dsi
- Programmer: Keypad
- Phone Type: TDMA
- NAM Type: EEPROM
- Transceiver: KRC 113 412/10M R1A
Programming Sequence: Power On ("No" Button)
After phone initialized, Ericsson logo will appear,
followed by a Rogers AT&T logo, then main screen.
NAM Re-Programming: Press 987 and then the 'Menu' (or right arrow) button.
Once you enter the proper codes in, you will be taken to the main menu (image below).
You have three options to choose from...
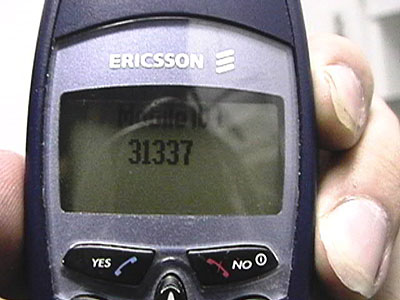
Menu 0 -- Change your "Mobile ID 0" by replacing the ten '0's with any random number; it
doesn't appear to do much but cause your phone to become temporarily disabled. Hit the
down arrow to be entered into the "Band Order 0" screen. I tried entering a series of buttons,
but there seems to be no way to modify your Band Order 0.
Press the down arrow again to enter into the "Neut. A-Tag 0" screen. Press the buttons on
your keypad to add your own text. Press the down arrow to enter into the "Fav. A-Tag 0" screen.
Press the buttons on your keypad to add your own text. Press the down arrow to enter into the
"Home A - Tag 0" screen. Press the down arrow to enter into the "SOC 0" (Scroll to Operator Code)
screen. You should see '0000' - this can be modified by pressing the buttons on your keypad. Press
the down arrow to enter into the "SID 0" screen. You can modify the "System Identification" number
by entering any valid SID for your area. For Rogers AT&T, the SID for their TDMA phones is 16391.
Note: All of "Menu 0" appears to be a testing NAM menu for Ericsson / Rogers AT&T techs. The useful
stuff seems to be in Menu 1 and 2 (below).
Menu 1 -- Change your "Mobile ID 1" by replacing the ten digit telephone number (your wireless phone's
area code + local number). You can essentially change this to anything you want. Don't bother trying
to steal service from other Rogers AT&T mobile phones ("cloning") as that requires you to have the
victim's ESN, MIN, special EEPROM (NAM) reflashing software, and a cable to transfer the data. Press
the down arrow to be entered into the "Band Order 1" screen -- I tried entering a series of buttons,
but there seems to be no way to modify your Band Order 1.
Press the down arrow again to enter into the "Neut. A-Tag 1" screen. Press the buttons on your
keypad to add your own text. Press the down arrow to enter into the "Fav. A-Tag 1" screen.
Press the buttons on your keypad to add your own text. Press the down arrow to enter into the
"Home A - Tag 0" screen. Press the down arrow to enter into the "SOC 1" (Scroll to Operator Code)
screen. You should see a special four digit number such as '2600' - this can be modified by pressing
the buttons on your keypad. Remember; Menu 1 on all Ericsson phones is the main NAM for cell service.
You can modify the "System Identification" number by entering any valid SID for your area. For Rogers
AT&T, the SID for their TDMA phones is 16391.
Menu 2 -- Same options as above. Except on this NAM Menu, you can add another valid Rogers AT&T
telephone number - hence why the Ericsson A1228dsi is called a "dual NAM phone." If your phone is not
locked onto the Rogers AT&T network, you may be able to use service from another TDMA carrier (no
others in Canada besides Rogers AT&T unfortunately), or an analog / AMPS wireless service provider.
COOL PICTURES - WOW!
IMAGE: MAIN NAM PROGRAMMING MAIN MENU
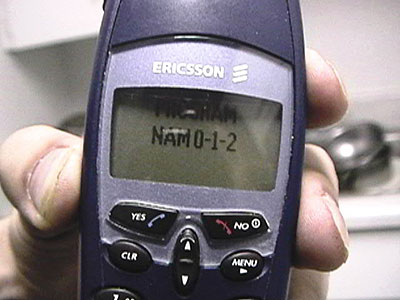
IMAGE: NAM PROGRAMMING MENU 0.
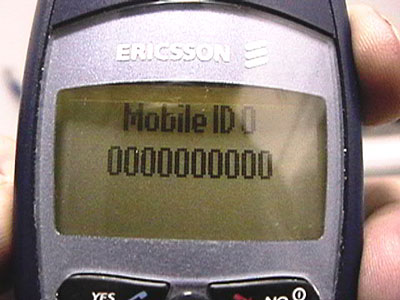
IMAGE: NAM PROGRAMMING MENU 1 (area code + phone number)
Long NAM Re-Programming: Press 923885 and then the 'Menu' (or right arrow) button.
Long NAM Re-Programming has similar options to regular 'NAM Re-Programming', but it offers the user
a deeper level of options. This can be considered the "root level" access in wireless phone programming.
"What are the features of Long NAM Re-Programming?"
You have three options to choose from: NAM 0, 1, 2.
(Note: NAM 0 is a "test menu", and isn't used for anything important.)
- NAM 0: First screen lists your unique ESN number; this cannot be changed without reflashing the EEPROM.
If you press 'YES' or 'NO', it will bring you to a screen which says: *** EXIT *** YES = Save ALL NO =
Abort ALL. Either option will reset your phone.
- NAM 0: Press the 'down arrow' twice and you'll be taken to the Go To Level 5 (SMS - Short Message Service).
Press the 'YES' button and you'll have the option of entering in the "Tele. Srvr" (Telephone Server?) address.
After you enter text into it, press 'YES' and you'll be prompted to Save or Abort. Press the 'down arrow' twice
and you'll be taken to the Email Gtwy (Electronic Mail Gateway). After you enter text into it, press 'YES' and
you'll be prompted to Save or Abort.
- NAM 0: To access the next menu, press the 'NO' button on your Ericsson, and press your 'down arrow'. Once
you're on the Go to Level 4 (Other DCC) option, press 'YES'. Now you can change the encoding of your Ericsson
from "TBCD" to "IA5". Press any key (besides Yes, No, Clr, Menu, Up and Down) to switch between encoding
modes. Press down twice to get to the 'Dom.Usr Grp' menu - it says "NOT IMPLEMENTED!". Press down once and
you'll see 'Intern.Usr Grp' menu - it says "NOT IMPLEMENTED!". Next menu down is 'EMERGENCY 3' - you can enter
any number here and *SHOULD* be free (along with EMERGENCY 2, 1 for the next two options). Press down - you'll
see 'IMSI NOT IMPLEMENTED' (IMSI = International Mobile Subscriber Identity). Press down, next option is 'PFC NOT
IMPLEMENTED'. After you choose your option, press 'YES' and you'll be prompted to Save or Abort.
- NAM 0: To access the next menu, press the 'NO' button on our Ericsson, and press your 'down arrow'. Once you are
on the Go to Level 3 (PSID/RSIDs) option, press 'YES'. You will see 'Edit NAM' PSID/RSIDs - you cannot edit this option.
Press down twice to View Reg Accept PSID/RSIDs, press down to View TestReg PSID/RSIDs - none are available to edit.
- NAM 0: To access the next menu, press the 'NO' button on our Ericsson, and press your 'down arrow'. Once you're on
the Go to Level 2 (Scan, etc.) option, press 'YES'. You will see a screen that says 'System B'. There doesn't seem to
be a way to edit this.
- NAM 0: The rest of the options are 'Band Order 0', 'Lock Code', 'Neut.A-Tag 0', 'Fav.A-Tag 0', Home A-Tag 0', 'SOC 0',
'SID 0', 'A-Key 0', 'Mobile ID 0' - which were explained earlier. Hit 'No' twice or 'Yes' twice to reset the phone.
- NAM 1 & 2: (ESN) Same as above.
- NAM 1 & 2: (Level 5) Same as above.
- NAM 1 & 2: (Level 4) Same as above - except 'EMERGENCY 1' which has '911' displayed instead of a blank space.
- NAM 1 & 2: (Level 3) Same as above.
- NAM 1 & 2: (Level 2) Same as above.
- NAM 1 & 2: (Many Options) Same as above.
More NAM Re-Programming: Press # SID # * and then the 'YES' button.
Once you enter this menu, you will be taken to an alert screen which says "Danger! Enter NAM? Yes or No".
Choosing 'No' will reset your Ericsson phone. If you choose 'Yes', you will be taken to a screen which says
"ESN [3 digit ESN prefix]" and 8 unique ESN #'s. Hitting 'YES' again will prompt you: "Enter Phone Number".
After you enter the phone number associated with the ESN, your phone will reset. If you enter the wrong
phone number, the phone will say 'Try Again!'. Be careful; if you do this too many times, you may lock the
phone! For reference, here are a list of known ESN prefixes and their hex-values that work on Ericsson's:
143 8F, 146 92, 157 9D, 204 CC, 215 D7, 231 E7, 240 F0.
Field-Test Mode: Press 904090 and then the 'Menu' (or right arrow) button.
This mode brings up a few menus - which displays various data about the network, the signal strength, etc.
Scanning With Your Ericsson A1228dsi:
(Added to file; April 24th, 2004)
Your Ericsson A1228dsi can be used as a manual scanner that picks up frequencies in the 830mhz range.
This is how you do it:
Enter 904050 then press Menu. Once you see the screen that says "TEST SET", press YES. Following that,
you should see the @ sign. Press 1, up (arrow), and the screen will say 'done'. Now press YES, 86, and you
should immediately hear white noise (static). As soon as you do, press YES, 830210, YES. If you're lucky you
should hear either two way conversation, one way conversation, or parts of static with some conversation.
Don't hear any static? Walk around your area a bit. Something will pick up eventually. Try entering other
frequencies in the 830XXX range, and you're bound to find a lot. The 830 MHZ range is used for analog cell
phones, and digital phones in non-spread spectrum, fully analog (AMPS) mode.
To exit out of 'eavesdropping mode', press 3 and up (arrow). The screen will show @3F, and a few seconds
later, the phone will reset and bring you back to the main menu.
Other options:
When you're in the @ prompt, you can do all sorts of things.
Press 99 at the prompt it will display random test information for your phone that changes within seconds from:
********
IRDB IN E2
********
to:
IRDB LOCK: NO
SOC LOCK: NO
to:
CNTR.WORD:0
BAND.ORDER:
12000000
to:
CNTR.WORD:0
BAND.ORDER: R
12000000
NUM.CELL:16
NUM.PCS: 7
to:
RS.CNT: 00300
RS.LOOP: 004
PROGRAMMED: N
to:
NPARTSOC: 00
NPARTSID: 00
to:
NFAVSOC: 00
NFAVSID: 00
to:
NFORBSOC: 00
NFORBSID: 00
to:
SID/SOC:
List:
(00)
to:
DONE
(Press YES to get to @ screen)
Commands you can use once in the aforementioned 830210 screen:
- * = 'a'
- # = 'b'
- CLR = 'c'
- DOWN ARROW = 'd'
- NO = 'e'
- UP ARROW = 'f'
Miscellaneous stuff:
Once you're in 'scan mode', you can press 85 to stop scanning.
While in the @ prompt, type 5F, and the screen will display what appears to be random numbers.
However it isn't random. It's the phone verifying what address / frequency you are currently on.
--
Conclusion: TDMA Wireless Phone Re-Programming is phun. Unfortunately TDMA is on its way out. GSM and CDMA
are the two biggest mobile standards in the industry. Rogers AT&T started offering GSM services around a year ago,
and will eventually throw away the standard that Ericsson once held so dear. Now go buy an Ericsson and hack away!
Credits: Wizbone for sharing the "# SID # * SND" command. Tr00per for sharing the wireless scanner commands.
Shouts: Hack Canada, Nettwerked, Toronto 2600, and dec0de.
Last Updated: Saturday, April 24th, 2004
(originally written: 11/06/02)
Written by: The Clone
[email protected]
--
Notes: For informational purposes only. Do not abuse this information.